
How many solar panels do I need for free camping?
 Having a comprehensive 12 volt electrical system installed in your Camper or Caravan is the key to successfully being able to free camp for extended periods of time. But how do you ensure the system you purchase or have installed on your RV is going to do what you need it to do and not leave you in the middle of the hot Australian desert with a fridge full of warm beer and spoilt food after a night or two? The answer is tricky but with the aid of a simple spreadsheet, most of the guesswork can be eliminated.
The first thing you need to do is to decide on how long you want to be able to go without access to mains power. You need to be realistic about this as many people plan to be off the grid for weeks on end but when it comes to what they actually do on their holidays, they are lucky to be free camping for more than a couple of nights. This means they end up over capitalising on batteries and solar panels with a subsequent increase in towing weight of the van or camper. If you don’t intend to do more than a couple of days free camping, your needs will be very modest. If you are realistically going to be spending days and perhaps weeks off the grid, you will need to be very careful about the system you choose.
So for the sake of the discussion, we’ll assume you want to have at least 5 days electrical capacity for free camping. Now you will need to determine what it is you want to power during those 5 days. This is where things start to get complicated.
Think of your batteries as water tanks that can only be emptied to just under half way. The reason for this is that discharging a battery to less than 40% capacity, expressed as its state of charge (SOC), can damage it. Putting it another way, a 100ah battery with a constant load of 1 amp will potentially run for 100 hours, but at that point, the battery will be completely flat and you don’t want to do that. You should not run that 1 amp load for more than 60 hours. If you need more to run the load for longer, two 100ah batteries will be needed. That will give you up to 120 hours to get to 40% SOC remembering, of course, we have not introduced any solar recharging at this stage.
Now 1 amp is not a lot and you will typically need to be running much higher loads constantly. Add another 1 amp to bring your constant load to 2 amps, and you effectively half your time to discharge. So instead of lasting for 5 days, you’re down to 2.5 days.
The reality is that you will not likely be running a constant load all the time. The load will vary as you turn appliances on and off. Also, devices like 12v fridges cycle on and off under thermostat control so their current draw is not constant either. So how do you determine what your actual drain will be? You cannot be exact about this as it will vary on many factors but there are ways to make some assumptions. More on that later.
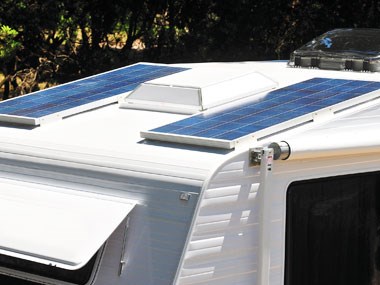
Next let’s examine what the solar charging system will allow you to do. Solar panels come in a variety of capacities normally graded in watts. With solar panels, size matters. The bigger the panel, the more sun hits its surface and the more electricity it can produce. Using Ohm’s law, we can determine that a 100 watt 12 volt panel is capable of producing about 9 amps of recharging capacity. In reality that is not strictly correct as there are many factors that come into play. Panels rarely run at 100% efficiency and, in reality, you may be lucky to get 7 amps constantly out of a 100 watt panel in ideal conditions. If you’re in Victoria during winter, it could be as little as 3 amps. This is because of the angle of the sun in relation to the panel, the efficiency of the recharging or solar controller and the length of the wiring connecting everything together all having a negative effect. String in 3 days of overcast conditions in a row and you may find yourself never fully recharging your batteries.
If all this sounds confusing (and we haven’t even considered the different types of solar controllers), fear not. Help is at hand.
I’ve attached the Solar Calculator Mk II here that you can use to determine how much battery and solar capacity you will need to meet your free camping needs. The spreadsheet looks complicated but in reality it is very simple to use.
First enter the capacity of the solar panels you think you will need. Start off with 100 watts. Enter the short circuit current and open circuit voltage of the panel. You will find these in the panel’s specifications. Let’s set to 5 and 20.6 respectively. Next, enter the size and length of the cable going from the panel to the solar controller. A best guess will suffice here. I’ve used 5 metres and 10mm cable. Then select the type of solar controller you have and its efficiency rating, again you will find these on the specs for the controller. If you cannot determine these, use the default settings of PWM and 0.9. Then enter the length and size of the cable going from the controller to your batteries, again best guess will suffice. For now use 5m and 10 mm. Now enter the combined capacity of the batteries. If not known, start with 100 ah. Set the initial state of charge value to 95% as it is rarely 100%, and the minimum allowable SoC at 40%. Next, set the type of batteries being used. If in doubt, set to Flooded Wet Cell.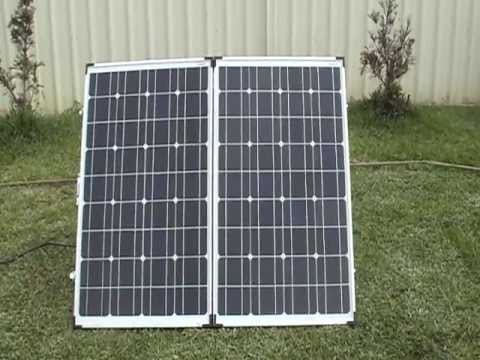
Now that you have done all that, you can start to make some estimates of the appliance usage you intend to have. This will require you to make some judgements and also research the exact current draw of appliances you will have running. For instance a fridge that draws 5 amps may cycle on and off so that it only draws those full 5 amps for half the day, maybe more in hot weather. At night, with cooler temperatures, it may cycle less as it doesn’t have to work as hard to maintain the set temperature. We’ll set the day current for the fridge at 5 amps for 10 hours and 5 amps for 6 hours at night. Next we will input some values for lighting. Good quality LED lighting systems draw very little current on their own, but combine multiple lights at the same time and you can easily be drawing 2 or more amps. Fortunately you only use them at night so let’s say 1 amp for 1 hour during the day and 3 amps for 4 hours at night. Leave the inverter blank for the time being as not everyone has an inverter and if they do it may be used sparingly. Lastly we’ll assume you want to entertain the kids in the evening so for the TV, we’ll say 3 amps for 3 hours at night only. Next we need to set the location to take into consideration the varying average available sunlight to that location. We’ll set it to Canberra as that is a pretty good average location.
Last thing we need to do is input some solar charging hours. I like to keep this relatively conservative so I can take into account any overcast conditions that may be present. So will set the charge size to 5 and the charging duration to 3 hours each day. Now scroll down to the graph.
At this point we can see that during summer, we will likely get about 6 to 7 days out of this system and about 5 days during winter before our battery reaches 40% SOC. That’s pretty good but in reality, I would assume it would be a bit worse than that. Now you can change some of the values to see what effect that will have on your usage graph. Increase your solar panels to 200 watts and increase your battery capacity to 200 ah and suddenly you can extend out to nearly 7 days.
Remember even though this is a fairly comprehensive spreadsheet, it is still only an estimate and it cannot account for extremes, but it should be sufficient to determine with a relatively high degree of confidence, what sort of solar and battery system you will need to power your intended free camping needs.